Thursday, December 29, 2011

Memory Box


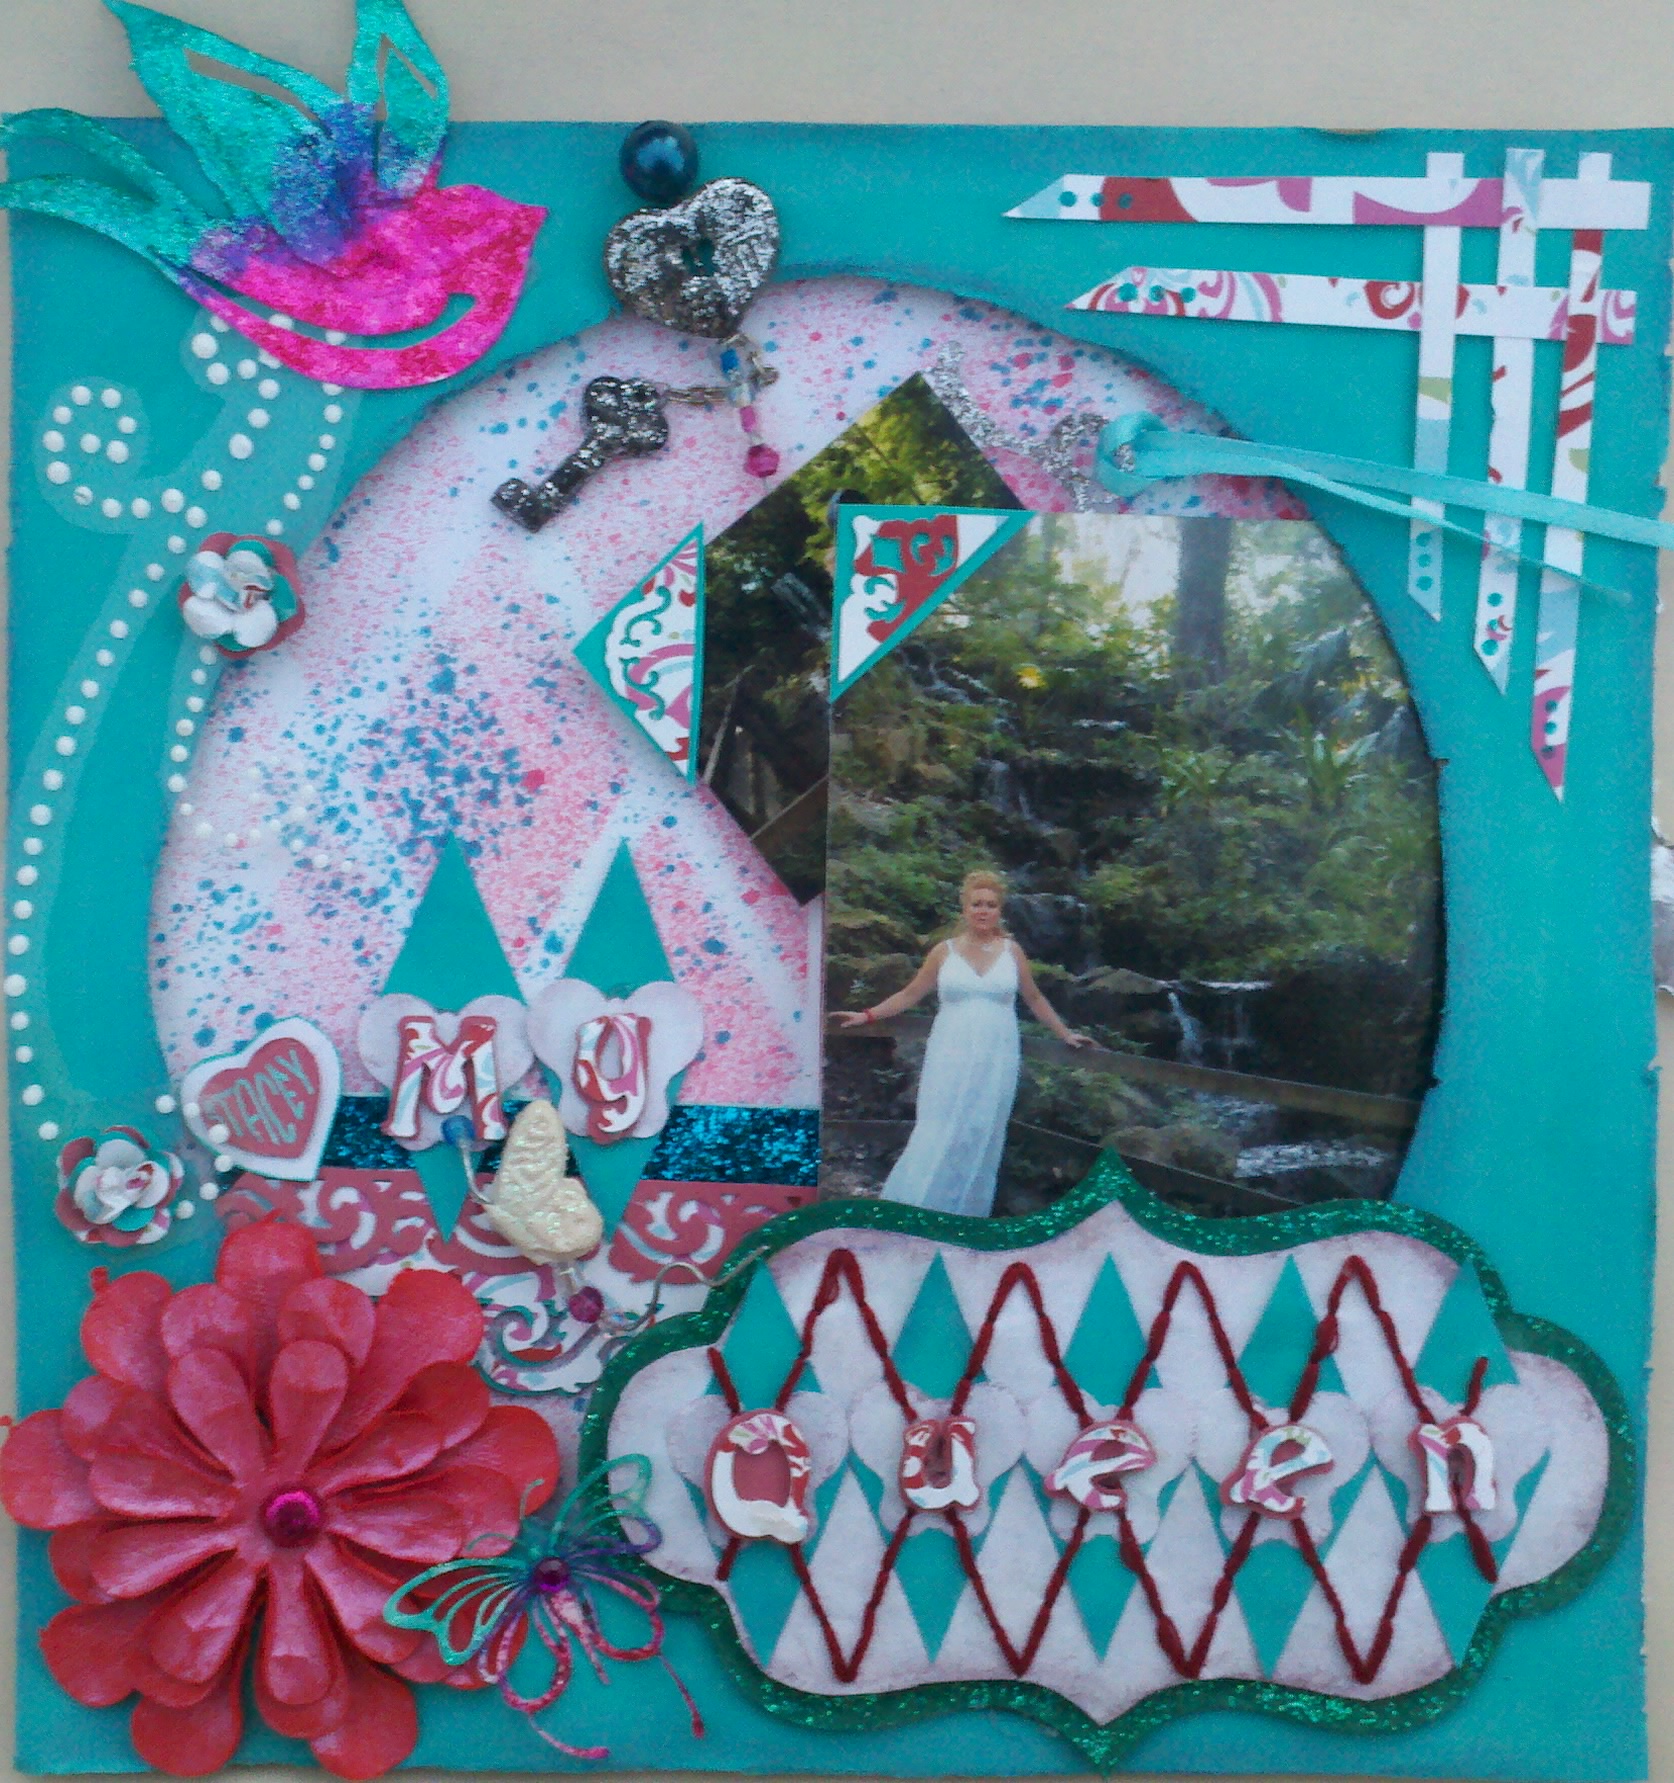
This is a project for my mom's birthday. I've always wanted to pose the kids for pictures to represent each month and order a calendar for my mom. Instead I decided to organize a calendar for her and she can select and order prints and collages to represent each month. The plan is for two mini albums (I use very bulky embellies) for each half of the year. This is the box itself - an altered cigar box.


Click to play  this Smilebox greeting
Create your own  greeting - Powered by Smilebox
Make your own digital ecard


How-Tos:
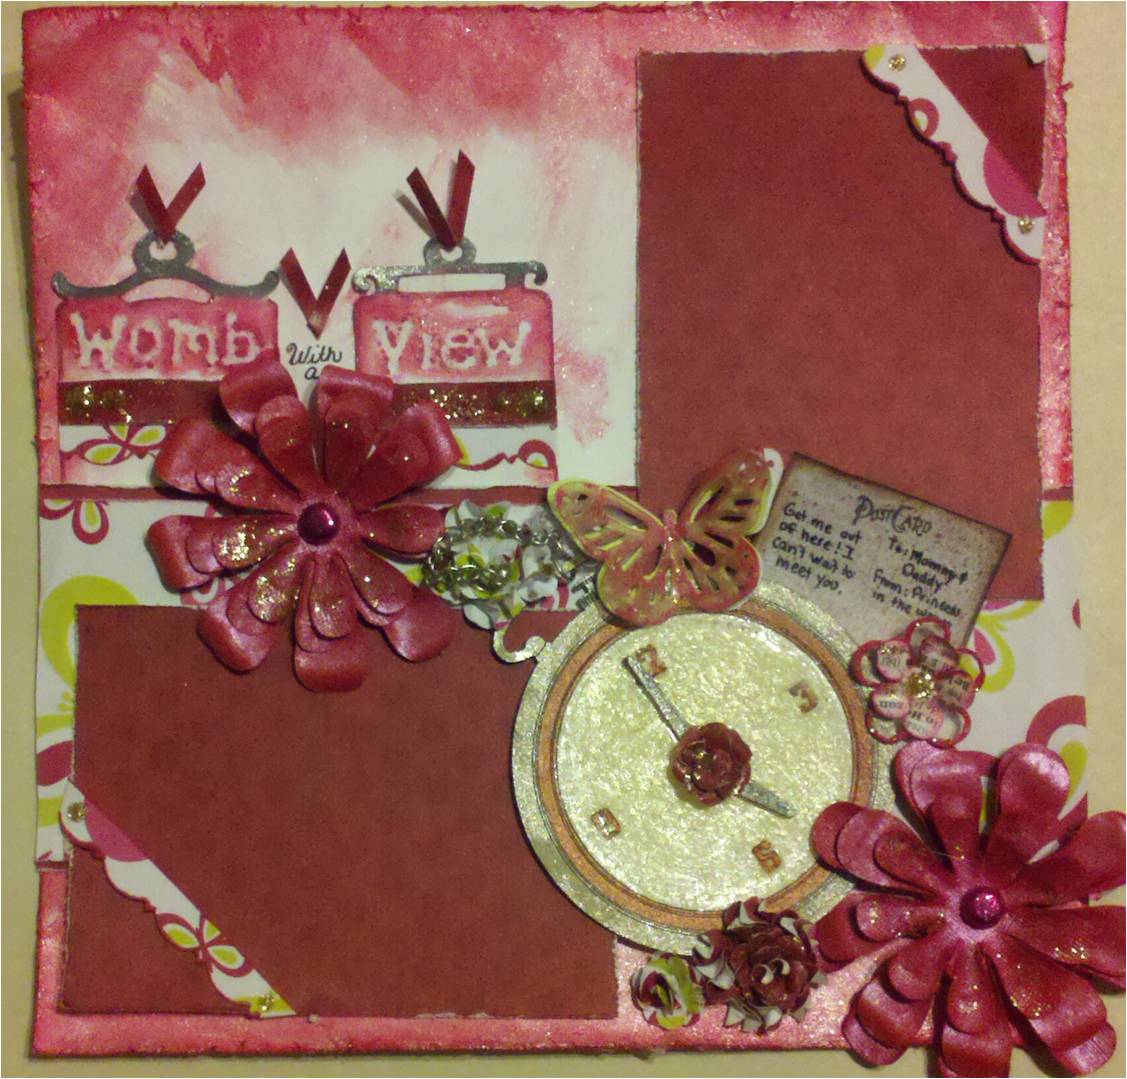
The name plate was made with a Forever In Time- chipboard tag. I adhered Styrofoam to the chippie and covered that in aluminum foil tape. I used a gel pen to "faux" engrave the plate. I layered the chippie in black, crackle medium, and copper paint.

The pocket watch is a chain and a bottle cap. I used my wire cutters to cut a slit into the top of the watch and I inserted a brad into the slit. Next I painted the chain and bottle cap in layers of black, crackle medium, and copper paint. I glued a clock face into the pocket watch and smeared a little brown chalk on the face. The last step was paint hands on the clock face an to add gloss accents to the clock face.


Pattern Paper:
• GCD Studios - Donna Salazar - Antiquities Collection - 12 x 12 Double Sided Paper - Queen Bees

Letter Stickers:

• K and Company - Eco-Modern Collection - Embossed Stickers – Alphabet

Embellishments:

• EK Success - Jolee's Boutique - 3 Dimensional Stickers with Gem and Glitter Accents - Gold and Silver Locks and Keys Repeats

•Prima - Say It In Pearls Collection - Self Adhesive Jewel Art - Bling - Border Strips – Cream

Forever In Time- chipboard tag

• Prima - Holiday Lights Collection - Glitter Sprays - Pearl • Martha Stewart Crafts - Double Craft Punch - Large - Monarch Butterfly

Dies an Punches:

EK Success - American Girl Crafts - Petite Punch - Flower

• EK Success - Paper Shapers - Slim Profile - Mini Punch Set - 2 Pieces - Flower and Retro Flower

• EK Success - Paper Shapers - Decorative Punch - Retro Flower

• EK Success - Paper Shapers - Slim Profile - Large Punch - Retro Flower

• Bazzill Basics - Chipboard Pack - 15 Sheets (for jean heart)

Coloring Mediums:

• Tattered Angels - Glimmer Mist Spray - Coffee Shop

Gels, Pastes, and Mediums

• Spackle mixed with a touch of Folk Art- copper

•Folk Art- copper, black, and crackle medium

Others:

Best flexible Molds- brass bird

• Bud Lite bottle cap for pocket watch

Friday, December 23, 2011

2011 Layout Count Down

It seems December is full of count downs, so I wanted to do a count down of my ten favorite layouts/projects. I'd love to hear about your ten favorite projects. Please comment and leave me a link to your blog with your ten favorite projects. Here's my list with links to the original posts and tutorials.

And one last note....

Please leave me a comment with a link to your blog and I'll add your link to this post. Tell your friends to join this informal blog hop, let's say, locomotion since I'm asking everyone to jump on board.

I'd also like to offer a RAK to a random subscriber to my blog when I reach 100 members.

#10 Pride- The color and the picture to this layout make this the first of my favorites. I also love the stitching technique Andrea showed off during this blog hop. I gave a tutorial about how to make faux bling.

#9 Dress-Up tag- I think it was about a year ago I learned how to make origami corsets and I just love making them. I enjoy making tags and working on small detailed projects.


#8- Life card- I don't make cards EVER but this was a design I had to try out. This was a lift "Guilty" by Scraperlious; she did a complete how-to at the crop stop.


#7 - Future MVP - I enjoyed making this page for two special reasons. First, it was made from memorabilia from the actual game. It was also special because I made it as a guest designer for the wonderful and fun Counterfeit Kit challenge. Besides all this I also did this for the Scraplift the Muse challenge at Pages In Time, so this is based on a layout called "Time Shares" from Scrapperlicious.


#6 God's Gift- This was a layout I did for a challenge requiring that I lift a digi layout ("Towards my Fate"by Glensgirl). What I enjoyed most about this project is the DCWV papers. Layer and distressing these papers always look amazing.

#5. Womb with a View- This 3TailsCraft Chippie was a breeze to work with and cover in paints and glossy accents.


#4. My Queen - Another creative chippie to manipulate by 3tailscraft. I stacked it and covered it in paper with a hand sewn argyle pattern. The chippie butterfly's bottom was dipped in cranberry red and the top was dipped in teal. For the butterfly's final coat I covered it in icicle stickles. I included a faux bling bird.


#3. The Letter K- This is the "K" page I made for my beautiful step-daughter. I used lots of handmade flowers and faux stick pins from clay. This is the first time I quilled in this style and the letters were lost on the pretty paper. To make the letters more visible I matted them in black and framed them in a chippie frame covered in Spackle.


#2 <3- This was a page I made for The Color Room challenge. I followed their sketch. I enjoyed experimenting with spackling and a stencil. I will definitely be doing more of that!


#1. My Junk Mail Minis - I made two mini albums for my step-daughters and this is by far my favorite project of the 2011 year


Jump aboard to see more count down layouts!!!


1. Melanie

Friday, December 9, 2011

Brought to You by the Letter "K"


and by Best flexible Molds by Penni Jo. I used their clay mold to make the "faux" dragonfly stick pin. To see the tutorial click here.

This was the first time I quilled letters in this fashion. Unfortunately they were lost on the page due to the beautiful but busy background paper. To make the letters stand out I created frames by smothering spackling on cardboard frames. I added white paint and a light coating of iridescent paint. Behind the frame I mount black card stock to really make the letters project off of the page.


I loaded the page full of my a variety of handmade flowers. I got a new set of itty-bitty EK flower punches so I had a great time punching, folding, twisting and gluing. Thanks to Adriana Bolzon's layout "Wish" for the idea of adding all the branch punches. It sure helped jazz up my bouquets.

Wednesday, December 7, 2011

Clay Paper Clip Toppers


Here's another fun creation using my Best Flexible Molds by Penni Jo. This time I will walk you through a very easy project: Clay Paper Clip Toppers.


To make the paper clips, I pushed the top of the paper clip into the clay while it was in the mold. The bit of clay I used to help remove the clay from the mold is pinched off and molded around the paper clip.


Thursday, December 1, 2011

"Faux" Stick Pins with Clay


I purchased more Best flexible Molds by Penni Jo after falling in love with the one set I purchased. I had a fun play with clay day and I created faux stick pins, brad toppers and paper clip toppers. I will post tutorials for the paperclips and brads at a later time.


To make the faux stick pins I used my wire cutters to clip off a small piece of wire. I followed the clay mold instructions but just before I removed the clay from the mold I stuck my wire slightly into the mold if I wanted it at the top.

For clay on the center of the pin, I left a pinch of the clay I used to remove the clay with on the molded pieces.
I removed a lot of the excess clay but I left a nice lump over the pin.

For some stick pins I made a second mold and used that in the back of the pin. I baked the clay and wire according to the directions. Using random bead and hot glue, I added the extra goodies to the pin.

Saturday, November 26, 2011

LUV Color Room


I made this page for the progressive challenge and for the newest palette at The Color Room. I found a new use for my stencils. I covered the stencil in Spackle to leave a texture design on the page. I covered the dried Spackle in white, frontier blue, and black paint. I also included a faux stick pin made with my new Best Molds by Penni Jo. I'll post a tutorial later this week. I followed GabriellaP's water distress flower tutorial.


Step 7 for the progressive challenge was to use personification in your journaling. here's my take: "Dear Baby, Come out soon. Running out of Room. From Belly"

That is a fun step. Have you used personification in your journaling? I would love to see links to your projects with personification.

Thursday, November 24, 2011

Sneak Peek


This month has been a little under productive in the realm of scrapping. I sure hope I finish the projects I intended to finish in the next few days. My plan (or actually my husband's plan) was to have my step daughter's project done and in her hands by Thanksgiving. Needless to say I'm behind, but I felt the need to share a few peeks 'cause it is turning out so cute.

Tuesday, November 15, 2011

Paper piece masking


Here's my attempt at something new. I layered my masks like a paper piece and colored them in different colors according to the layer. When I perfect the technique I'll post a tutorial.


This is a lift of Ashley and Emmitt By Vincarash and she lifted Liberty By DaNel Hicks completed for the round robin challenge at sb.com.

This is a faux flourish. I traced a stencil on a cereal box and covered it in Spackle.

Sunday, November 13, 2011

Thankful for You

This is a lift of Heathergw's "Thankful for You". Completed at the progressive challenge for the color challenge at sb.com. Our next progressive will be the Saturday of the month. It's a guaranteed good time.


Thursday, November 3, 2011

November Home-made Kit


This is my kit for November. My plan is to scrap the posed Christmas pictures of Dallas from last year. I've included a baby food jar and a few empty cigarrette packages. I pulled out lots of the old Prima goodies. It will be hard for me to use these pieces because I have issues parting with goodies. I included ribbon from Big Lots and a garland type ribbon from Dollar General. I think I'll add some silver garland as well. I also include silver leaves and branches from the Dollar Store. I also have a package of metal embellies I got on sale from a scrap store after x-mas. The manufacture is unknown. I'm also going to use my package of Heide's chipies. Smaller papers are DCWV. The other papers included Colorbok and GCD. The pearl colored alphas are Colorbok. I also have left over packages of Christamas Embellishments. I'll reveal my creations at the end of the month.

Saturday, October 29, 2011

Baby Milestones

Lifted from "My first mini album" by NewSnow0518. For the one hour challenge. A big thank you to Kelly for most of the goodies for this page!!!


Boo Crew


My folks and my niece. For the progressive challenge ...more rounds this weekend...come play. Also for the scraplift challenge based on "Grandma" by Lindaj3. Pumpkin frame inspired by "My Little Pumpkin" by Laleesmom.


Sunday, October 23, 2011

Pride


This was a fun page I made with my 2 year old niece. I placed stickers on the page for the title. Next I placed a lid and 4 quarters on the page where I wanted my paw print and claws to go. After my masks were in place I added a water down mix of paint in clumps over the title letters. To ensure coverage of the letters I brushed the paint over the letters. With a straw and the help of my niece we blew the paint mixture over the letters and down the page. What fun right?


close ups -circle layers spread down


flowers and