Saturday, February 5, 2011

February Counterfeit Kit - Scraps of Darkness

I found a fun blog that encourages you to mimic popular kits. It is called the Counterfeit Kit Challenge.

For the month of February, they are encouraging scrapers to replica the wonderful “Scrap-of-Darkness Kit.”

Here’s my take on the kit.

I love this idea because if I don’t have it I will paint it or make it. For this challenge I painted paper and beads to match the kit.


This paper was added to match one of the papers I noticed in the add-on kit.


Also I stamped with ink and paint. Transparencies were used to make flourishes.


The fun part was trying to make the diamond mirrors. I thought about visiting my brother and picking the pieces off of a broken disco ball he has, but I think he’d get mad at me. So instead I used the mirror colored gift bag and double sided tape to make my own. The gift bag originally came from Dollar Tree. I noticed that Dollar General carries a silver/mirror tissue paper.


Monday, January 17, 2011

Lady in Red

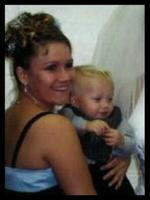
I compiled random shots of my mom from my brother's wedding. Based on a page map.


This tag was inspired by Lisa. Here's a link to her directions so you can make one too.


The title was a picture of my brother's wedding cake. Using my Cricut and a Styrofoam plate, I cut out the word RED. Using the plate I traced with a gold marker the word RED on a transparency. I cut out the transparency and also the cake picture and layered all these pieces.


And here's a picture of me with the baby.


The title was fun to make with aluminum tape and paints for distressing. I rolled the letters across a snowflake with my rolling pin to add texture.


Here's an old stork stamp from my collection. It is paper pieced and covered in stickles to bring it to life.


The ruffle is actually my journaling.


One little word- THANKFUL

As I start this new year and I reluctantly prepare to head back to work after having quality time with my handsome little man, I will by a lottery ticket in the hopes that work can be a thing of the past. Yet I must be thankful I have work to go to. Last years little word would be waiting. We spent a lot of time waiting. Waiting to know if we would have a baby, waiting for our wedding day (yeah like three years of that), waiting for little man, waiting for information from the hospitals thanks to his trips back there after his initial release. But this year the word is thankful. Thankful he is fine healthy and wonderful. Thankful that my hubby and I have jobs to provided for our children. Thankful to have a hubby even if I don't feel that way all the time. Thankful for my busy life that seems nonstop because at least I have places to be, people that need me and people I need. 2011 is a year to be thankful for.

Friday, August 6, 2010

Teddy Bear Multi-Strip Quilled Technique


You will need glue and paper the color of the bear and an alternative color. I also use a BBQ skewer to roll the paper around.

Cut 2 strips in brown or white (depending on color of bear) down the length of the paper
Cut 1 strip length in another color (for example: blue for boys or pink for girls) down the length of the paper
These pieces will be looped three times with the middle loop the longest

Glue the strips at one end


Form a loop but pull 2 of the strips down to make the loop open up and make layers. Glue the ends of the loop.

Create a second loop slightly larger than the next and make layers again. Glue the ends of the loop.


Make a final loop at the same size as the first loop. Glue the ends of the loop.

Wrap the remaining length all the way around the loop creating a large loop and glue it in place.


Cut the excess off. Take the colorful piece of extra and cut it half. Quill both small pieces for eyes. Pinch at one end to create a tear shape.

Cut 1 strip down the shorter width the color of the bear and cut in half for the ears.
Cut 1 strip down the length in bear color for the head.
Cut 2 strips down the shorter width the color of the bear for the feet.
Cut 2 strips down the sorter width the color of the bear for the arms- pinch when quill is glued to make it tear shaped.


Saturday, January 16, 2010

Grand Close Ups

Grand: grandpeople, grandparents, grandaunt and granduncle. Here's a layout feature some of the grandest people in my life.


This is my Grandma Betty. She was full of life from being hungover in the bathroom, to boating and outdoors fun or simply making a face at her work she oozed life.


I am one weekend from launching my on-line embellishment shop. I will continue demonstrating the occassional how-to's, but I will also sell goodies for those less motivated. Here's a few of my favorite hand-mades: blinged butterfly and rolled flowers.


I also making iris folded tags. The shape was the left over after I cut out the above butterfly.


Here's a rose bush another of my favorite hand-made yummies.


This title was fun to make as I found the word "grand" and other "grand" related words in the dictionary.


Here's my son from baseball 2 years ago. Love the action shot and this close up. This is actual a scraplift so the layout is copy of This is actual a scraplift so the layout is copy of The more I practice...by Hanging By A Moment from sb.com.


Wednesday, December 30, 2009

Step 2 for give away -

tell people about it


Check out this give away - http://wwscrapdivas.blogspot.com/

Monday, December 28, 2009

Curled Flower

I am guilty of falling in love with a store bought flower, yet I try to do everything as thrifty as possible, so I knew my love could NOT last due to the shortage in my wallet. I have been working on a way to create a similar flower. While my version is nowhere as beautiful as the store-bought-beauty-that-stole my heart, I am very pleased with how they have turned out and would like to share them with you.


Supplies:
Two- hand-cut or die cut flowers (I used the “Wedding” cartridge on my Cricut) I found that three flowers works nice too with the bottom flower remaining straight
Ink - I used a blue marker
A bbq skewer
Spray starch (you can use a spray bottle of water or a wet cloth)
Adhesive (I find a glue gun does the job strong and quick)
A rolled rose (see my previous blog if you’ve never made one of these: http://ohschwietscrap.blogspot.com/2009/11/paper-rose-schwiet-way.html or anything creative for the center like a botton, brad, circle hole punch, or even a quilled circle


I start by ink staining the edges of the flower and marking a little into the center of the flower.
Using those marks, I cut up into the center of the flower a little. This will emphasize the curl more.


I glue the two flowers together. Feel free to play with sizes. I also find that double sided is the most impressive since the underside will be exposed when the flower is curled; however, I cheat and glue two coordinating papers together.


Spray the now double flower with starch. Before I roll the petals I dab a little off. If you don't have spray starch, you can wet the petals for the similiar less stiff result. I wet by placing the flower on a damp cloth, but a spray bottle of water would work. I've also been told Glimmer Mist works too.


I pull back one edge of a petal on the top layer while curling it around the skewer.


When the petal seems to be in the position I like I scrape a bit of the paper with my thumb nail making a crease.

Repeat the rolling to all that petal on the top layer and continue with the bottom layer. Play around and experiment with how much curl you want as well as the direction of the curl. Here’s a little tip: even with the starch the flower will uncurl just slightly so you will want to exaggerate the curl some. I have found that I prefer rolling the top layer and the bottom layer in the same direction with the top layer having a tighter curl. I now love rolling the petals forward towards the center!!

When it dries it will remain relatively stiff.


At this point I hot glue a rose bud to the middle. Some flowers I crunch slightly around the bud.

After playing some more I discovered a few tricks by mistake....I really like the look of only one flower rolled...also lining the two flowers up and rolling just the front layer looks pretty cool too.